Installing applications on Ubuntu (Gnome desktop)
If we want to provide more accessibility and ease of use to our scripts or applications, we can add and register them in Ubuntu as if they were desktop applications.
This way, they will be available both on the desktop, in contextual menus, etc…
1. Creating our application
We are going to create a script that will contain the code of our example application. In this case, we create it in the /home/{youruser}/launchers folder of the user, but you can create it wherever it suits you best.
cd ~
mkdir launchers
cd launchers #
touch regards_builder.sh # we create the file that will contain the script
sudo chmod +x ./regards_builder.sh  # Give execution permissions (+x)
(regards_builder.sh) with the following content:
#!/bin/bash
read -p "Please insert your Name: " userName
echo "Hi $userName !!  nice to meet you"
sleep 2
We are also going to download an image that will serve as the application icon:
![]()
We can download it like this:
The directory of our application will contain these 2 files:
2. Registering the application in Gnome Ubuntu
Now that we have the code of our application, we are going to register it in Gnome.
It is as simple as adding a file with the .desktop extension in the /usr/share/applications folder.
We go to the /usr/share/applications folder and create a file called regardsApp.desktop
We open the file with our favorite editor and insert the following content:
[Desktop Entry]
Name=Regards App
Comment=Regards Application
Exec=/home/dpena/launchers/regards_builder.sh %U
Terminal=true
Type=Application
StartupNotify=true
MimeType=text/plain;
# TRANSLATORS: Do NOT translate or transliterate this text!
#              This is an icon file name.
Icon=/home/dpena/launchers/regards_icon.png
Categories=GNOME;GTK;Utility;TextEditor;
# TRANSLATORS: Do NOT translate or localize the semicolons!
#              The list MUST also end with a semicolon!
#              Search terms to find this application.
Keywords=Text;Editor;Plaintext;Write;gedit;
DBusActivatable=true
X-Ubuntu-Gettext-Domain=gedit
Our application is now registered
3. Registering the application in the menus
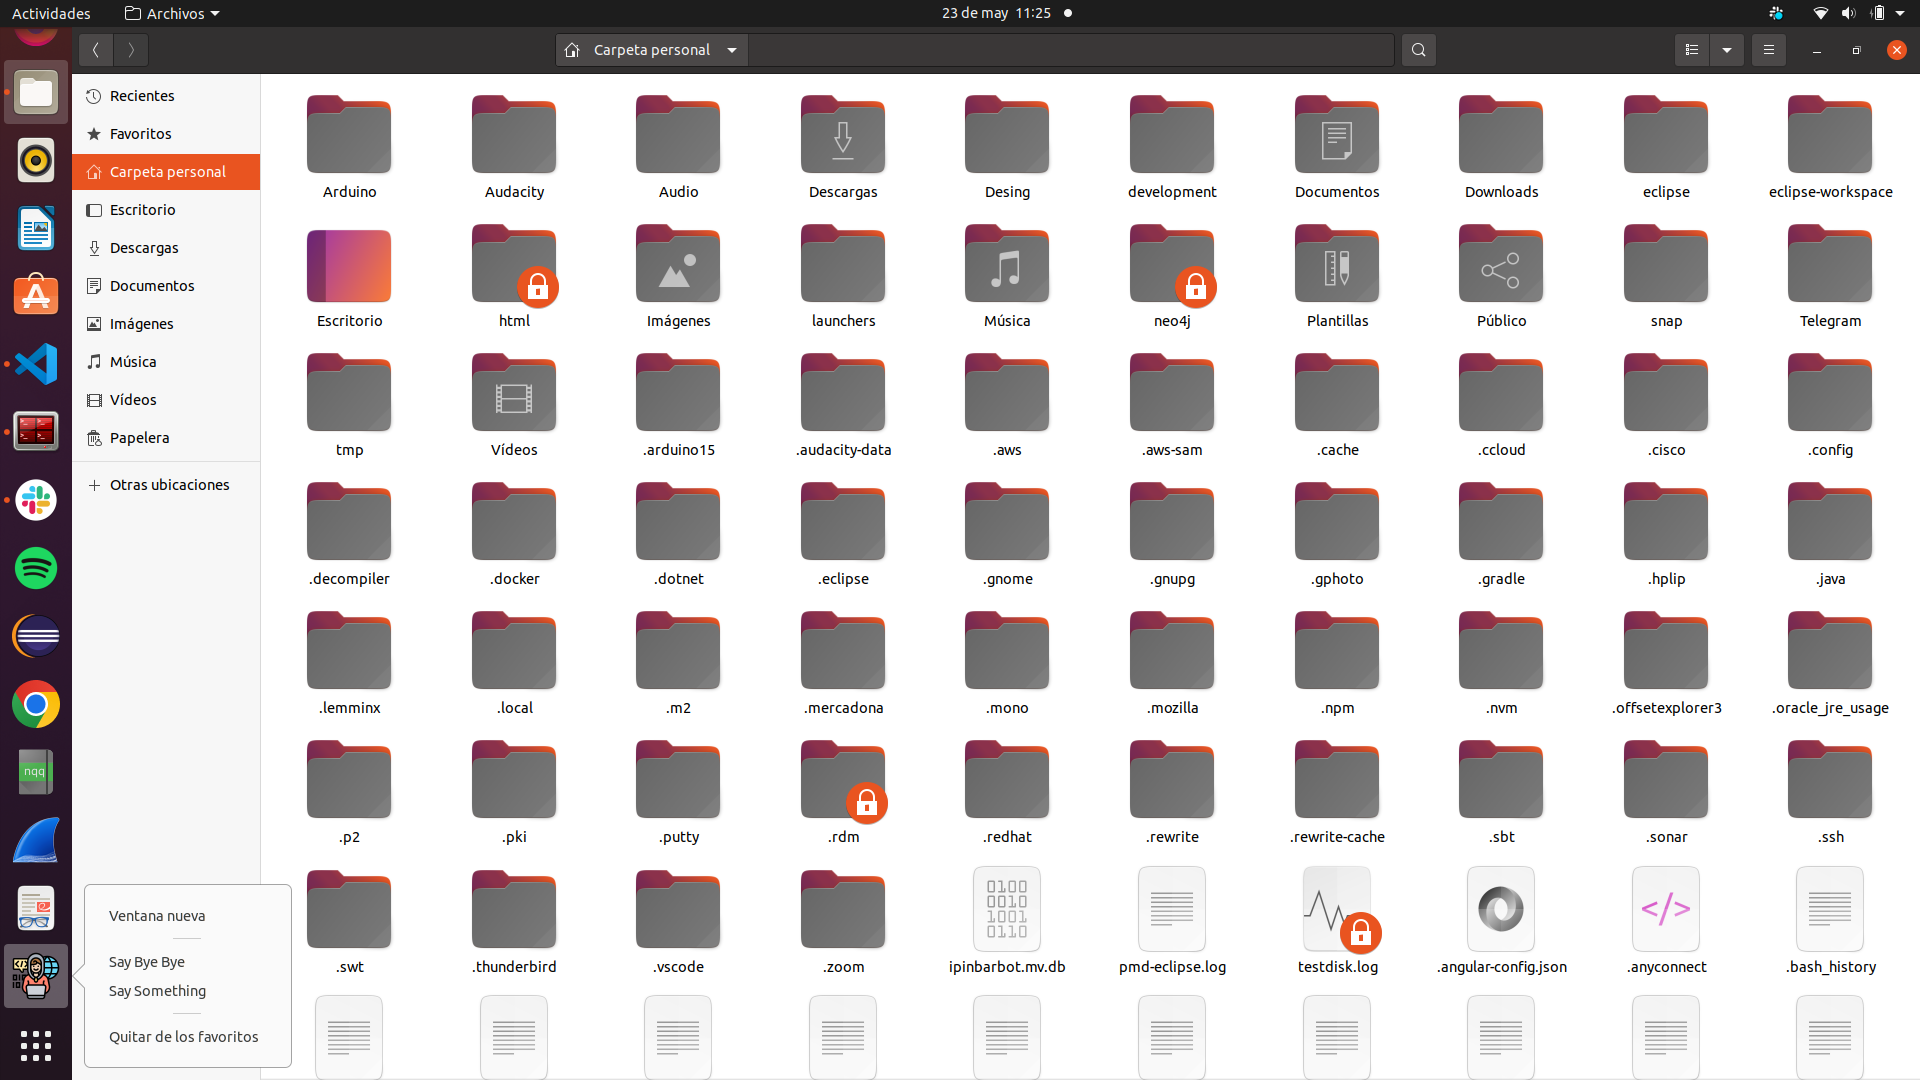
Once the application is created and registered in the application registry, we want to also be able to see it from the visual interface (Gnome).
We search in the applications menu (the button with the dots)
Filtering by the application name (in this case Regards App) or also by what is specified in the Keywords section

If we right-click on it, we can add it to favorites (which will make it appear in the fixed application menu that we have on the left in Ubuntu 20)

Now we can use it by clicking on the icon
![]()
4. Adding multiple executables to our icon
So far we have created an application that can be executed from a favorites bar icon.
Now we are going to add more executable options to our program.
We create 2 more scripts in the directory of our application (~/launchers)
#!/bin/bash
~/launchers $ touch say_bye.sh
~/launchers $ suco chmod +x ./say_bye.sh
~/launchers $ touch say_something.sh
~/launchers $ suco chmod +x ./say_something.sh
We edit the files and include some execution logic:
say_bye.sh
say_something.sh
#!/bin/bash
read -p "Please insert your Name: " userName
echo "I have something for you $userName !!"
sleep 2
We are going to add these 2 scripts as contextual options to our application.
We edit the file we used to register it: /usr/share/applications/regardsApp.desktop
and add the Actions section
And further down in that file we define the say-bye and say-something actions pointing to their respective scripts.
[Desktop Action say-bye]
Name=Say Bye Bye
Exec=/home/dpena/launchers/say_bye.sh
Terminal=true
[Desktop Action say-something]
Name=Say Something
Exec=/home/dpena/launchers/say_something.sh
The final content of the file will look like this:
regardsApp.desktop
Gnome is instantiated when the graphical environment starts, so these contextual menu options will not be available until we restart the computer.
We can see that by right-clicking, the contextual actions we defined in the .desktop file appear:
5. Opening a specific file or directory with our application
We can go to the file explorer and right-click on a file and select “Open with another application”.
In that menu, search for our application by typing its name/keyword

When selecting our application, the script indicated in the Exec section will be executed
This section indicates that the sh script will be executed and that the first argument passed %U is the current directory (or the selected directory).
All available options/wildcards can be found in the specification.
6. References
You can get the code for this tutorial at
https://github.com/deadveloper666/desktop_app_example
All possible options and specifications for this .desktop file are collected in the official specification
https://specifications.freedesktop.org/desktop-entry-spec/desktop-entry-spec-0.9.5.html#example